Tools & Materials
This is what you will need to install your shutters. For large shutters it is best to have a second person help hold the blind in position.

Spirit level

Caulking gun

Step ladder

Cordless drill*

3 mm drill bit
*cordless drill with a Phillips head drill bit
Before we get going
1 Know what you’re drilling into
If you’re drilling into wood, follow the steps below.
If you’re drilling into plaster, you have two options:
- use a stud finder to locate where your wall studs are, then follow the steps below.
- use a Ramset 10 mm Grip Hollow Wall Anchor, which will help secure your shutter to plaster.
If you’re drilling into concrete, stone, brick or tile, use a Masonry drill and appropriate plugs, anchors or screws.
If you’re just not sure, call or email us so we can help!
2 Are your window, floor and hands clean?
3 Go through your custom kit and make sure everything listed below is there.
Your Shutter Kit
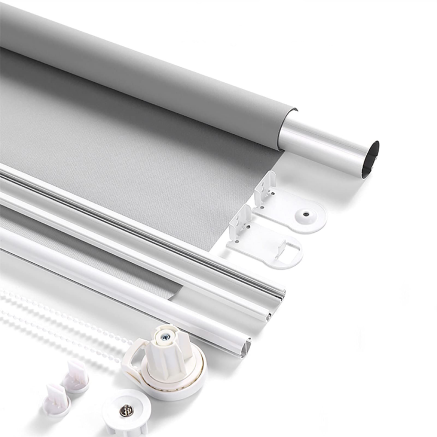
- Your roller blind.
- A chain drive bracket.
- Pin end bracket.
- Screws.
- P clip (for child safety).
- Ball stopper.
- Bracket covers (face fit only).
- Your pelmet, if you ordered.
- 2 Pelmet returns (face fit only).
- 2 Pelmet sprung brackets (recess only).
Let’ get started
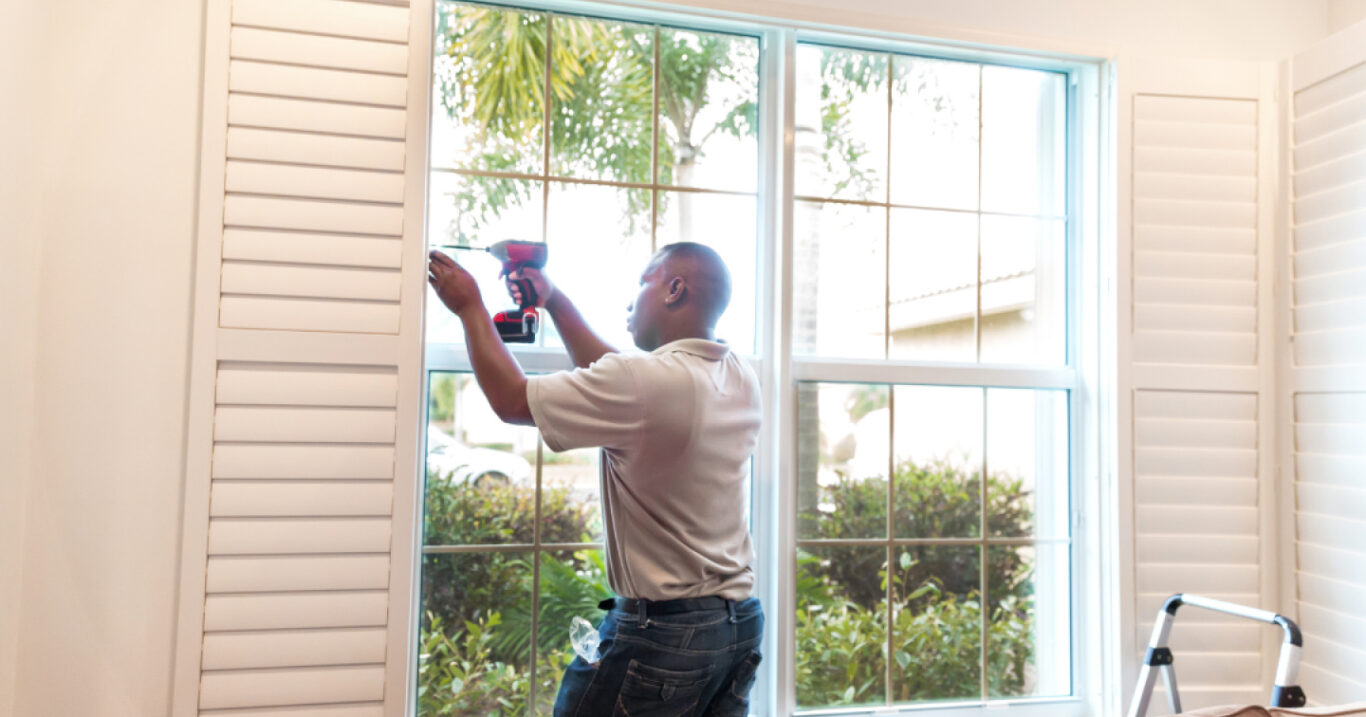
Installing your shutters is easy and fun. Follow these 5 steps, then kick back and admire a job well done.
Here’s how to do it:
1Get organised
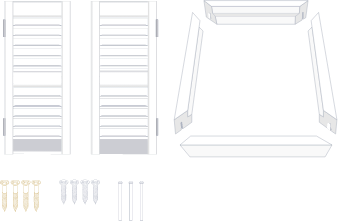
Unpack your kit, and gently lay it all out on a clean, hard surface or the cardboard packaging it came in. Be careful not to scratch the parts when moving them.
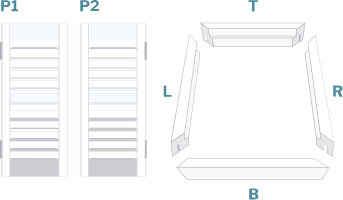
We label sections of your frame and your panels, which will help you to match up the right panels and hinges later. Lay out the shutter panels the right way up and in order from left to right.
2Click your shutter frame together and screw holes
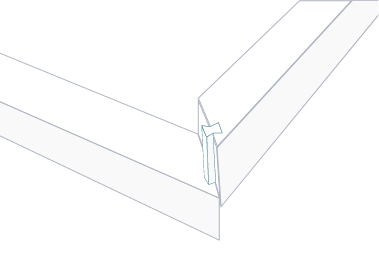
Click each section of your shutter frame together using the Hoffmann keys in your custom kit, and feel free to use your body weight.
The keys come attached to sections of your shutter frame. If they’ve fallen out that’s OK, just slide them back in.
If you’re finding it difficult, it’s usually because the Hoffmann keys have come out on one side.
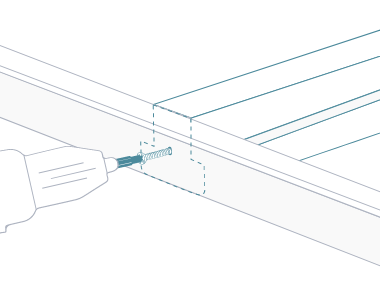
If you have T posts, screw them onto your shutter frame using your cordless drill and the long black screws in your custom kit. There are pre drilled holes on your shutter frame, to show where you’ll attach the T posts. The top of your T post will be labelled t, and the bottom b.
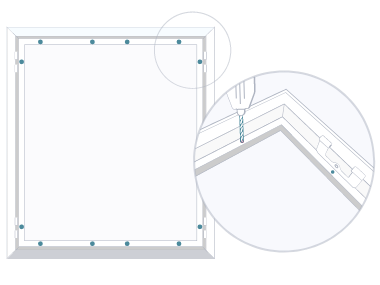
Turn over your shutter frame and lay it back down. Using your cordless drill with the 3 mm drill bit, drill holes through the back of the shutter frame, in line with each hinge. Also drill four, evenly spaced holes through the back of the shutter frame at both the top and the bottom. The back of the shutter frame will attach to your window frame.
3Mount your shutter frame
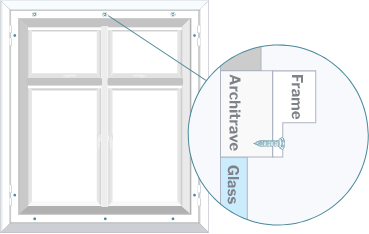
Lift your frame into place, on the outside of your window frame. It can help to have two people for larger frames, so you don’t bump the corners of your shutter frame.
Drill each screw at the top of your shutter frame part way in, using your cordless drill with the Phillips head drill bit and the screws in your custom kit.
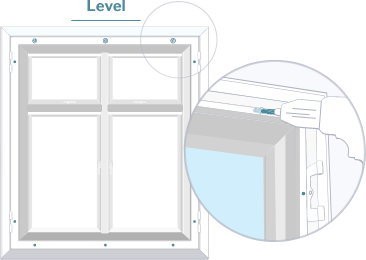
Wiggle the frame until you get it looking level across the top. You can rest a spirit level on top of the frame while you do this.
Tighten the top screws.
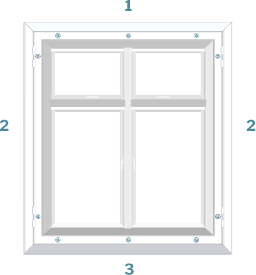
Drill in your side screws next, and then your bottom screws. You can check your shutter frame is even across the top by using a spirit level.
4Attach your shutter panels and check your shutter frame
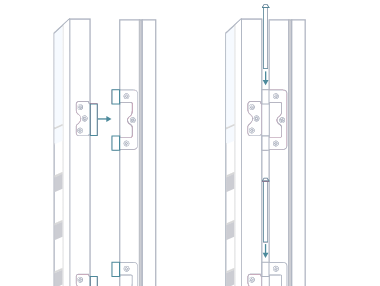
Remove any black bands from your hinge pins before you start. Pick up your left panel and hold into position. The brackets should line up on the left side of your shutter frame and your panel. Take a hinge pin and drop it through the bracket, from the top. Repeat for each panel.
Hinge pin not sliding in? Check if you have panels upside down or if your frame is attached upside down.
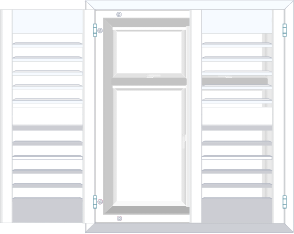
Check that your panels open and close easily. As they can be heavy, it’s normal if you need to lift the edge of the panel and nudge it on.
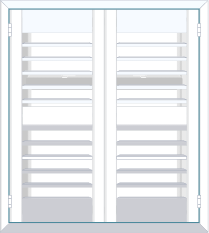
Check for a thin, even gap between each side of your shutter frame and your shutter panels.
Shutter panels won’t stay closed? Check out the ‘I need some extra help’ section at the bottom.
5 Get Insta ready
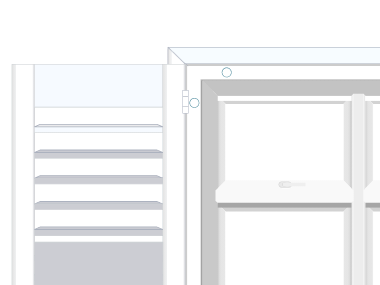
Grab the stickers in your custom kit and stick them onto each visible screw.
1Get organised

Unpack your kit, and gently lay it all out on a clean, hard surface or the cardboard packaging it came in. Be careful not to scratch the parts when moving them.

We label sections of your frame and your panels, which will help you to match up the right panels and hinges later. Lay out the shutter panels the right way up and in order from left to right.
2Click your shutter frame together and screw holes

Click each section of your shutter frame together using the Hoffmann keys in your custom kit, and feel free to use your body weight.
The keys come attached to sections of your shutter frame. If they’ve fallen out that’s OK, just slide them back in.
If you’re finding it difficult, it’s usually because the Hoffmann keys have come out on one side.

If you have T posts, screw them onto your shutter frame using your cordless drill and the long black screws in your custom kit. There are pre drilled holes on your shutter frame, to show where you’ll attach the T posts. The top of your T post will be labelled t, and the bottom b.

Turn over your shutter frame and lay it back down. Using your cordless drill with the 3 mm drill bit, drill holes through the back of the shutter frame, in line with each hinge. Also drill four, evenly spaced holes through the back of the shutter frame at both the top and the bottom. The back of the shutter frame will attach to your window frame.
3Mount your shutter frame
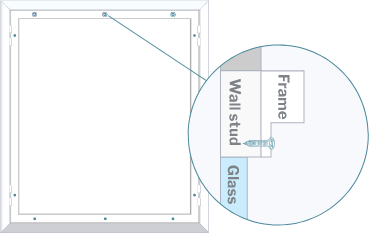
Lift your frame into place, on the outside of your window frame. It can help to have two people for larger frames, so you don’t bump the corners of your shutter frame.
Drill each screw at the top of your shutter frame part way in, using your cordless drill with the Phillips head drill bit and the screws in your custom kit.
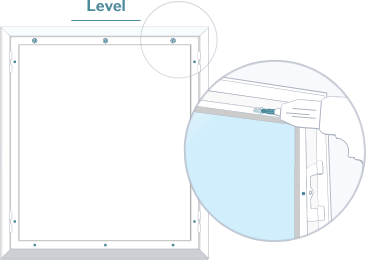
Wiggle the frame until you get it looking level across the top. You can rest a spirit level on top of the frame while you do this.
Tighten the top screws.
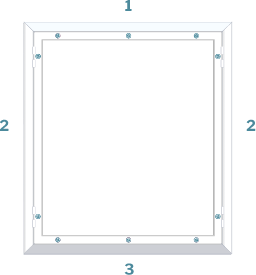
Drill in your side screws next, and then your bottom screws. You can check your shutter frame is even across the top by using a spirit level.
4Attach your shutter panels and check your shutter frame

Remove any black bands from your hinge pins before you start. Pick up your left panel and hold into position. The brackets should line up on the left side of your shutter frame and your panel. Take a hinge pin and drop it through the bracket, from the top. Repeat for each panel.
Hinge pin not sliding in? Check if you have panels upside down or if your frame is attached upside down.
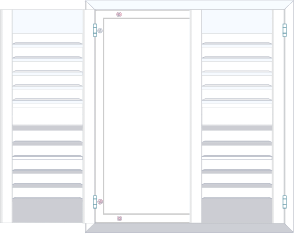
Check that your panels open and close easily. As they can be heavy, it’s normal if you need to lift the edge of the panel and nudge it on.
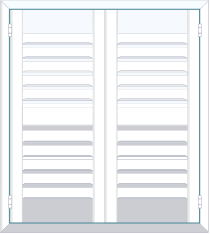
Check for a thin, even gap between each side of your shutter frame and your shutter panels.
Shutter panels won’t stay closed? Check out the ‘I need some extra help’ section at the bottom.
5 Get Insta ready
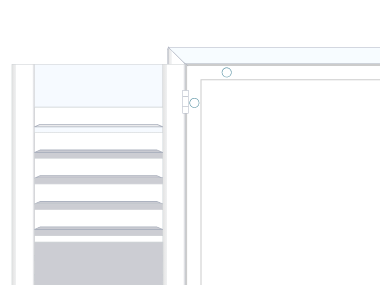
Grab the stickers in your custom kit and stick them onto each visible screw.
Manufacturer’s Warranty
Feel confident in your purchase, with the best warranties in town.
*Variable warranties apply to fabrics and components depending on the fabric type and manufacturer.
Care & Maintenance
Need some extra help? Find the most common questions we are asked with helpful solutions in your purchase, with the best warranties in town.
Lorem ipsum dolor sit amet, consectetur adipiscing elit, sed do eiusmod tempor incididunt ut labore et dolore magna aliqua. Ut enim ad minim veniam, quis nostrud exercitation ullamco laboris nisi ut aliquip ex ea commodo consequat. Duis aute irure dolor in reprehenderit in voluptate velit esse cillum dolore eu fugiat nulla pariatur.
